SK II RNA power essence review, normal to dry, tropical climate

Hi guys, been a while

This time I want to share my experience with SK II RNA power essence

I believe there have been so much review about this product, so I won’t repeat all of them, I will just make some on point review, and full product or pictures won’t be found in this review, since… I believe you all have seen them somewhere around google or dept store

The packaging is luxurious, but since they come in a glass bottle, I won’t say its travel friendly

My mom introduced this thing for me, since her skin is super oily, she only used them 1-2 times but her skin got greasy, and she told me to try since mine was the opposite.

I have a normal to dry skin type.

Before trying this thing I have already using the 10 steps Kskin care diligently, but still looking for the holy grail serum for anti aging

I was 28 when I tried this thing, and I got my skin age checked at the nearest sk2 stores, it was 26 years.. not bad huh?

Ohkay? Antiaging? Who doesnt want the kind of healthy, wrinkle free, glow from within skin those korean moms have?

So for the first 2 weeks using this product, I used it every day and night in the routine. I displaced my last serum before trying this one, which I forgot… but still sk2 facial treatment essence never left my face, meaning I’m using this rna essence along with my sk2 pitera FTE…

And to my surprise? I got darkened, the kind when you felt your skin got dull? I panicked and consider to stop using it. I told my mom and she gave me an advise I won’t ever regret. She told me to keep using it and be patient with the result, the dullness will go after a while

And I kept using it, for a year, years after. So

My experience said:

– pores? No it does not “shrinkened my pores” since I have normal pores, so Its not really matter

– Fine lines? It did reduce my fine lines, but I haven’t notice it until several months using it (4-5?) so I can’t tell which time is the quickest to get the “reduced fine lines” result

– anti aging? YES, totally

How do I evaluate it objectively? By going to get my skin checked about a year after, and guess what, now my skin age is 16!!!!!

I mean, like, is that really possible?

Isn’t just this skii thing bluffing?

Hmm but I don’t think so, my mom’s skin also becoming brighter (she used the aura genoptics essence)

So overall, this is 5/5 for me

It’s pricey yes, but if you can get a good deal out of it, please do.

I’m on my second “bigger” size bottle (they have 30 ml and 50 ml).

And make sure to use the smaller one first, in case your skin reacts differently

Hope this one helps!

-luz-

Review: Too Faced: NO Make up Make Up face

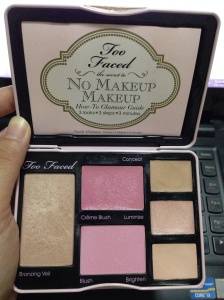
okay so this is the first too faced product I got and this is what it’s looks like:

Too Faced The secret to No makeup Makeup
Too Faced
The secret to No makeup Makeup

ever since I bought this at sephora singapore, I can’t wait to lay my hands on another too faced product, coz they are sooooo good in quality, except for the price.. it’s pricey T-T.. I Bought this in 52 SGD

so there are 6 items in this palette, and this is I think the most have palette for travel, coz it does what it says, to make you look without wearing any make up on, but still look so glowy and fresh
I will tell you what I mean
but before: here are the swatches:

swatches
swatches

they have:
1 bronzing veil
this is my most favourite product in this palette. the tone is perfect for my fair asian skin tone. it has a little bit of shimmer within, but don’t worry, it’s so transparent and just the perfect amount for adding all over glow for the face.
and since too faced always come with steps for 3 looks you can create with their palette, you can try their suggested looks but still practicing and playing with your own creative desire ^^

1 creme blush
i was first very skeptical with this kind of blush because, I think it will make a blot/dot on your cheek, and since it’s sticky so it would be hard to blend them along with your other makeup products. but I find that this isnt the case with this blush. I can’t tell how this creme blush is so easy to blend, and it gives very beautiful color on your cheek It’s just the nice healthy, pinkish glow. and to be honest, I prefer using this other than the powder blush that comes along within this palette.
when I first swatched it, I think it look soooo pink, it won’t look natural, but I’m glad it turns out to be the opposite

1 powder blush
okay so this is just typical powder blush, but its so pigmented, so I need to use it light handedly, and build up the color instead just buffing them all over my cheek. other than that, it’s good quality, of course….

1 concealer
this is a cream based concealer, just a typical concealer you can use to cover any blemishes. it can get drier when I haven’t use it for a while. but it’s okay and enough for daily basis

1 luminizer
my second favourite product in this palette. basicallly it performs the function of a highlight, so I use it for my cheek bone, cupid’s bow, tip of my nose, on my upper brow line, just to accentuate bony part and add dimension to my face. since it’s “no make up” face, so it wont end up tooo shiny, but just a nice glowy finish

1 brightener
I use this for under eye, to imitate the famous “kim kardashian look”, and it does a good job on that.

so I think that’s it for the review. and I also want to mention that I really appreciate too faced come out with 3 simple examples on how to use their palettes, coz if you’re a beginner and happen to buy this kind of face palette, it can be a little confusing on which one should I wear first, and where. and too faced gives you not only the looks, but the STEPS. like: 1 use concealer to cover the redness of the nose, second use luminizer to the upper part of your cheek bone… maybe you can see this picture for more information, and to give you more explanation, about what I’m saying

3 steps too faced no makeup

yeah, overall I’m pretty satisfied with this palette, and would repurchase it again if I run out of this.

rating: 4.5/5

Hope this post helpful

God bless
-luz-

Day time look

Hi there, today I wanted to share the look for daily purpose. It can be used with or without the eye make up, coz when I’m lazy I just take time to put the face make up and that’s it, but in case when I have more preparation time, I also do my eyes.

I create this look using lorac pro palette, my odbo bb cream, too faced “the secret to No makeup makeup”, and bare minerals Mineral veil.

I always do my eye make up first, and after that my face makeup. why? because when I do eye makeup, the powdery shadow tend to drop on my cheek, and it will stain my complete make up face.. Hiks, so eye make up first is definitely a better option…

For this look I use pewter, espresso, mauve, nude and white for the brow bone.
Photo 2014-07-11 11.18.54 PM

before putting eyeshadow, I use the etude house proof 10 primer. This is definitely the more affordable option rather than UDPP (urban decay primer potion) since the price is only about 6-7 USD.

1. I use pewter for my whole lid area, until it covers my whole lid area
2. Add espresso on the 1/3 outer corner of the lid, and slightly pulled the upper part using crease brush, to create a wedged shaped shadow
3. Blur any harsh line using middle tone eye shadow color “mauve” in the crease area and slightly higher to the lower part of brow bone (do not cover entire brow bone until it reaches the eye brow, since it’s the place for highlighter)
4. Use white as a highlight color for the brow bone
5. Using a flat line brush, I use the same “espresso” color to 1/2 of my lower lash line, start from the outer corner to the middle of the pupil
6. To make my eyes brighter, I use “nude” in the inner part of my eyes, and inner 1/2 part of my lower lash line
7. Eye brow, I just use my maybelline master brow in grey color (not sure if it’s the right name for it) to shape mine…
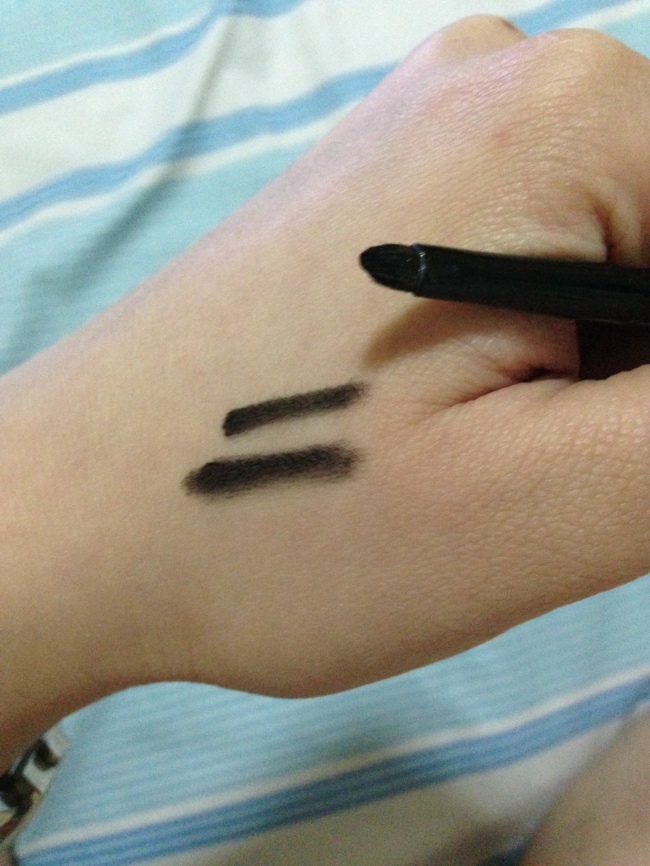
8. for eye liner I use my VOV original eyepender 24 hr waterproof eye liner (Really good one)

Voila… eye make up is done
IMG_5225

Next, I start my face make up using my smash box photo foundation primer to create a “base” for my entire face make up sit a lot longer on my face
then I use real techniques Expert face brush (very soft and nice, and recommended) and just buff my odbo BB cream. The BB cream blends to my face and skin tone very well. evens out any slight discoloration, therefore my skin tone.

Then I use my Too Faced No make up make up. I just recently purchased it and love it to the max. I will make a different section to review this amazing product.

on top of my BB cream, I…
literally just try to follow the instructions provided in the palette.

Too Faced The secret to No makeup Makeup
Too Faced
The secret to No makeup Makeup


Too Faced always comes up with 3 simple instructions to create your look...^^
Too Faced always comes up with 3 simple instructions to create your look…^^

You can just use finger to blend in the cream products, but for the powder based porducts, Some brush will be needed

So, I just want to share the tool I used to puth them on, that I found helpful to create the desired look
1. to “conceal” I use my concealer brush, and evens the product to my skin using only fingers to tap lightly
2. for “brighten” and “luminize” I use Real techniques pointed foundation brush. This is too small for applying foundation, but I think perfect for cream based products, taht you need to put on in a “not too precise” spot in your face
3. Bronzing veil is one of my most fav product in this palette. It’s not too brown, or muddy or what. It may look very light. but it really gives you the nice, face curve, with a little hint of sun kissed glow. LOVE it
I use my “blush brush” from real techniques, which is one of my favourite brush so far, and just swipe swipe swipe…
4. Next is the blush, I use “stippling brush” to put a little amount of creme blush in the apple of my cheek and blend is upward. If using a stippling brush won’t provide a good “fusion” between blush and the rest of my make up, I like to use the “buffing brush” from real techniques (again), just to buff and buff and buff, until I see them blend to my heart desire
5. Last, I use my “bare minerals “mineral veil” to set any cream/liquid based products on my face. I absolutely love this “veil” because it does what it claims to…. Gives you a very smooth finish look, without being CAKEY AT ALL!!!. they just make your face glow even more, and set your make up to last at least for 12 hours for normal to dry combination skin like mine… Maybe if you’re oily then you need to touch up every 6/8 hours..
Photo 2014-07-11 11.29.49 PM

and voila… I’m done…
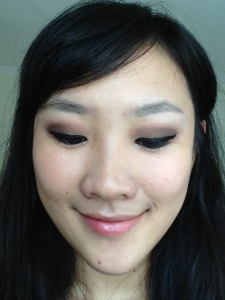
This is the final look
IMG_5229
20140711-231255-83575059.jpg
IMG_5220
I hope you enjoy reading and feel free to comment ^^
God bless
-luz-

Urban Decay Naked 2 Review

Hi guys, it’s been a while since I posted review of makeup products I have.

this time I want to share of this palette. I know there are already a bunch of reviews out there about this palette, yet just because I do this as a hobby, I will let you guys know my personal opinion about this palette.
So UD Naked 2 has 12 shades, and 9 of them are shimmery, meanwhile 3 are matte.
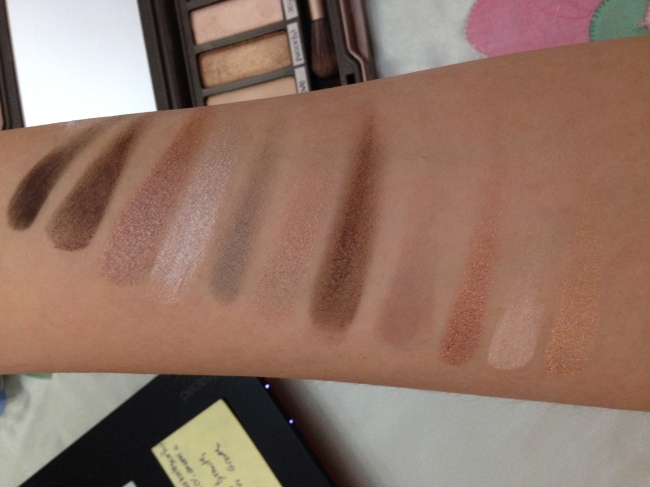
These are the swatch, and I use no primer to do this:
Image
from right to left (blackout-busted-YDK-verve-pistol-suspect-snakebite-tease-chopper-bootycall-halfbaked-foxy)
the foxy one isn’t visible on my skin tone (sorry 0.0)
all of the matte shades are wonderful consistency, and really great for blending purposes. I use the taupe colored almost everytime I do my eyemakeup, since it blends so well, and I personally think, this color match any eyeshadow color that you wear, although it might related to your skin tone though, as it can look a bit muddy (I think) for darker skin tones.
as far as I concern, the snakebites and verve, and YDK is the most buttery^^
the first color in this palette, FOXY, is a really great highlight color for under brow bone area.
I also use the shade ” ” to highlight, but since it has shimmer in it, now I only use it to highlight my inner corner and my half-inner lower lash line, instead of under my brow bone.
for the outer part of my eye makeup for daily look smokey eye, I use BUSTED and SNAKEBITE almost everytime I use this palette. usually I use the snakebite for day look, as for the night look I prefer something darker and more contrast color eyeshadow, which I found in shade Busted.
BLACKOUT also a good shade for doing intense smokey eye, and you can use this as a finishing touch for your eyeliner, as a finishing touch after putting a kohl eyeliner, to make it more long lasting ^^
My skin tone is neutral, with a little bit tendency to cooler tones. That’s why I think this naked 2 suits me better than the naked 1 palette.
I also prefer to wear more cooler tones eyeshadow such as YDK, or HALFBAKED color.
I personally found that color CHOPPER is the least used shade in this palette. and I do have complain about the shade HALFBAKED as it has many fallouts, so you need to tap them on before applying it.
but overall, this palette is very good and although the price is a bit “ehm” yet I personally say that it’s worthed
PS, I also made a little bit of variation, since I personallly don’t like the UD named the shade, haha, I just think if I said I wear “busted”, it doesn’t sound nice.
i know this might look silly, but I prefer to say “I wear love, patient, etc etc, whenever I do my make up with this palette…
Image
-look at the cute guy at the bottom right- XD
okay so that’s my opinion and how I use this palette personally and my preferences to wear some of the shades here, and feel free to comment below ^^
Till then
God bless
-luz-

Review: Real Techniques Core collection brush

Yayyy, finally back!

Are you guys having a wonderful week? Mine is. Hehe
Today I want to do a review on my newest brushes collection, which are the real techniques brushes. And I have to say, I totally recommend them.

I own the core collection, expert face brush and the blush brush, and they are pretty awesome! ( i will review the expert and blush brush in the next post)

First the core collection brush.
This set is a must have brush for daily face makeup routine, i would say. Why? You will see it in a second!

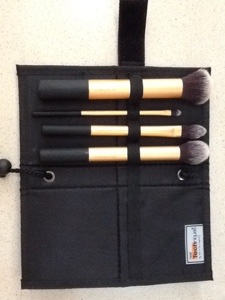
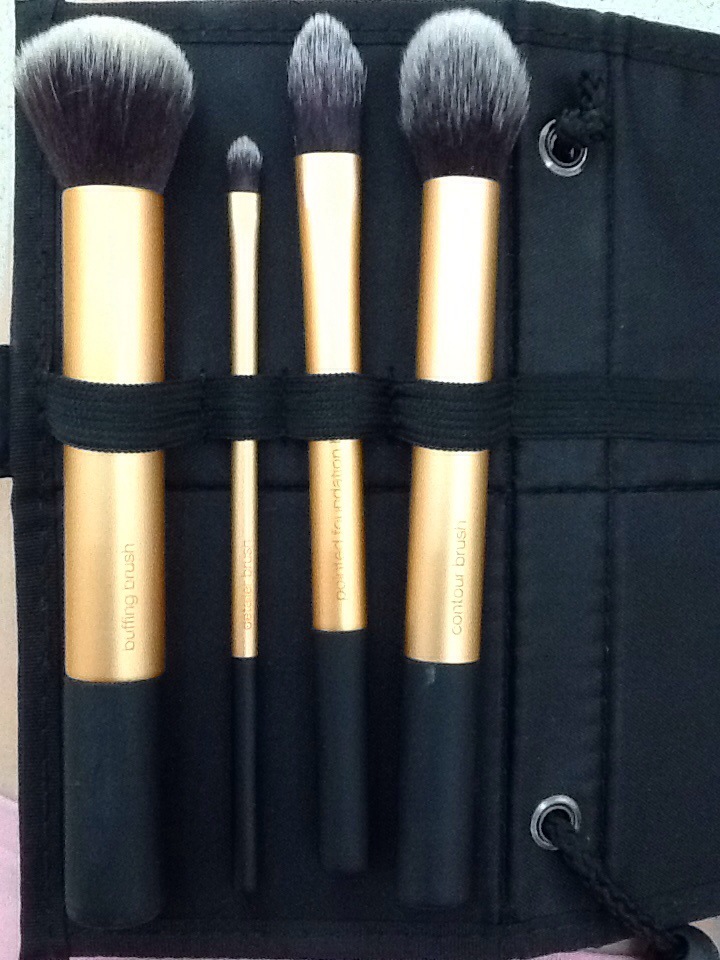
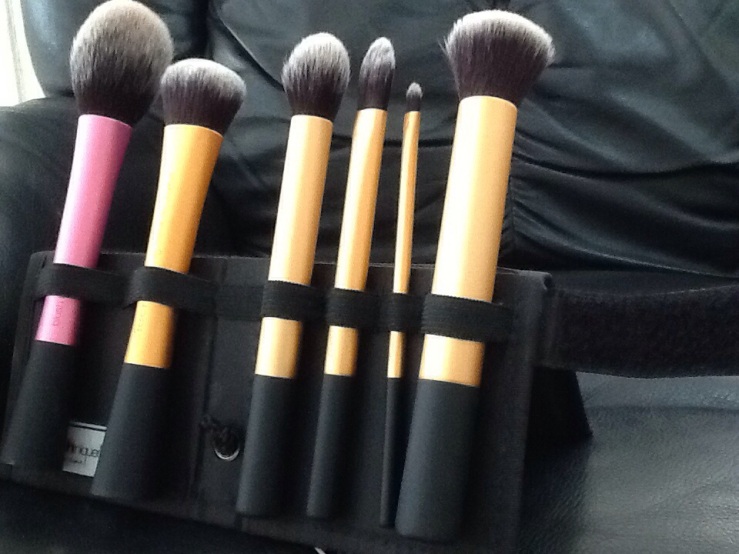
This set contains 4 brushes, they are:
1. The buffing brush

-dense bristles
– multi purpose: i use this for powder/liquid foundation and you can also use it for cream foundation, but need quite a work to make them streak free and give the airbrush finish. Since this brush is also good with powder based products, I also use them for my finishing powder, which I will just kind of stippling them to my skin after swirling and tapping all the excess powder. It works wonder, in my opinion.

How about blush or bronzing? Yes you can use it for that purpose too, and for me I use it in a stippling motion, to avoid having too many products on my face? But its still a very versatile brush which I definitely will grab when I travel and dont want to bring enormous stuff? Keep it simple, right?

2. The detailer brush

The smallest one in this set, it is very useful, i use it for adding some concealer to spot my acne, or applying more to cover the redness behind my nostrils, and finally just blend it with my fingers.
You can also use this for lipstick. Its sturdy so its easy to shape your lips using this brush, yet they are also quite flexible if you want to make a curve. So it depends on your preference

3. Pointed foundation brush
This! i use this to put concealer under my eyes to create a kim kardashian look, or I can use this for larger part I want to conceal. But I never use this for foundation, they are too small, and the result still needs to be blended with clean fingers….
But all in all its also a very multifunctional brush

4. Contouring brush
Love it! Perfect bristles! Perfect shape! Perfect amount!
Do you love to contour! This brush is for you! Precise, not overboard, yet still can blend the product easily to your foundation, powder, anything….
Definitely must try if I can’t sat you must have it!

One more thing! I love the packaging, which as the pic displays, very comfortable for traveling, also you can flip it so to have a standing make up brush holder. Very multitasking!

So thats my views about this set and I love them. i would like to know what’s yours? Do you feel the same, or you feel nayyyy?

Feel free to leave a comment, or give me suggestions, or anything! Haha

Hope this is helpful and see you later!
God bless

-luz-

20140428-102024.jpg

20140428-102114.jpg

20140428-102206.jpg

20140428-102324.jpg

What’s in my purse?

Hello guys, today I want to share what’s in my purse topic. Like many of the girls out there, we need some “weapons” to go and face our day right?
So here’s mine

20140422-104335.jpg

20140422-104346.jpg

20140422-104353.jpg

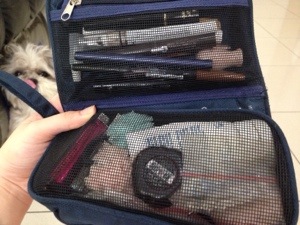
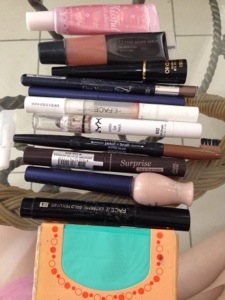
Haha so actually there are two sections, the first (smaller) part I put (almost) all my eye makeups there and some lippy products…
They are:
3 types of eyeliner, depend on what look I am going to wear
1. Original Goodbye eyepender Vov liquid liner
2. Face it extreme bold pen eyeliner (the face shop)
3. Proof 10 retractable pen liner (etude house)

One eye primer: proof 10 eye primer (etude house)

3 lip glosses:
1. The face shop (the swirling lollipop tube)
2. The body shop peppermint lipgloss tube
3. Kissful tint choux number 04 by etude (love this! With the sweet flavour when u apply this baby!)

2 eyeshadow pen:
1. Nyx jumbo eye pencil in dark brown
2. Line nuance duo etude house number ?

One stick concealer: suprise stick concealer (etude house)
Nyx Auto eyebrow pencil

And ofcourse my oil absorbing paper ^^ which i seldom use coz my skin isnt oily, buttt who knows? Right? So bring it anyway. Hahaha

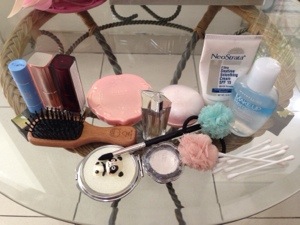
The lower part( bigger), I usually put some larger makeup products and accesories in there, so as you can see, i have my

2 maybelline color sensational in pink peony and nude colour
One lip balm from soothe
One handy comb from the body shop
My” angel” travel size from Thierry Mugler (love it to the max!)
One eyeshadow base from etude (a bit out of place, but welll, ahhaha)
neostrata ultra daytime smoothing cream ( I only use this when I’m traveling and in a hurry so I cant grab my odbo essence, just to moisturize my skin before any makeup on)
Dream on compact powder (etude house)
Lovely cookie blusher (etude house)
Small “panda” mirror
Tapered brush (masami shouko)
Maybelline eye and lip makeup remover

20140422-105809.jpg

20140422-105803.jpg

So that’s my “weapons” for daily basis, I would like to know what’s yours and your comments! Hehehe

So long! See you! And God bless!

-luz-

Daily face Makeup Routine

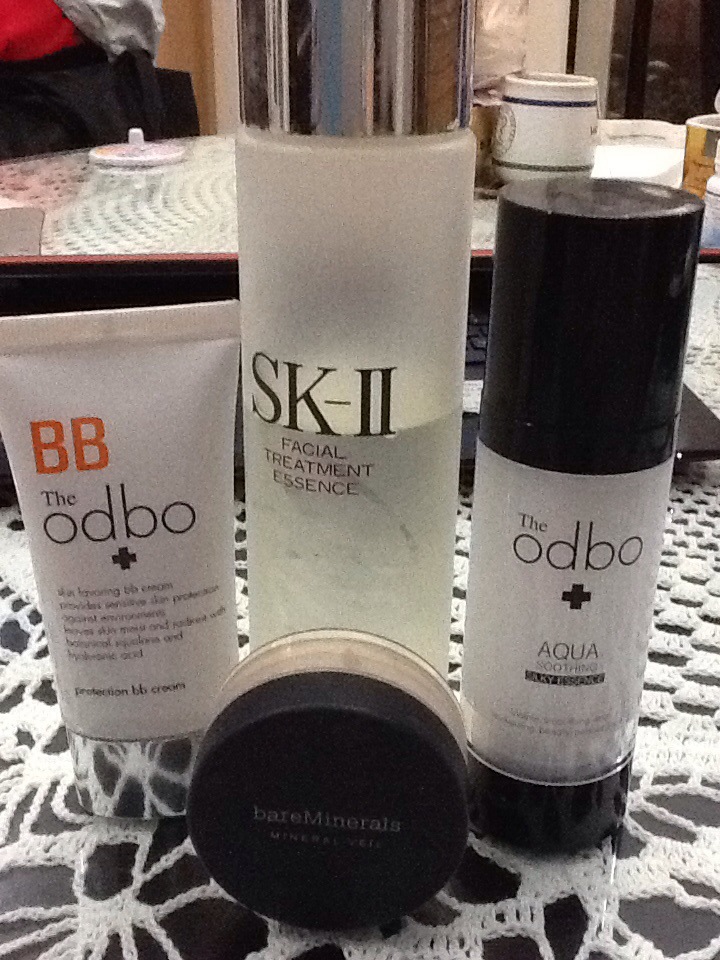
These guys are my friends for daily makeup routine for face.

For skin care I use the Odbo Aqua sooting silky essence for day wear. It gives a very smooth feeling on your skin, and it moisturizes mine on daily basis without fail!
The Odbo is local Korean brand, and I can’t find their retail in Jakarta, but still can purchase it online tho. The price right mow I believe its 38.000 KRW, or about 36,6 U$D.
Quite expensive but really worth trying!

And for the night, SK II Facial treatment essence
Well, no explanation needed! Since I use this essence my face gradually become brighter but not pale, a natural healthy glow! But I also feel sorry for the price. They come in different size, and if you purchase the bigger one, well it is a bit cheaper than the smaller one.

BB cream: the Odbo
I like this BB cream coz it gives me a flawless natural finish,not too glowy so it wont make my face looks slick and oily, yet it looks healthy. I dont have too many acnes personally, so i’m not using some HD foundation, or even standard foundation for daily use.
I have tried another brand for BB cream, but this one from odbo is my fav, and definitely my go to BB cream for everyday use.
Price about 35 $

Finishing touch: Bare Minerals hydrating Mineral Veil
Super like this! I just bought them recently and turns out that I really like it! Becoz its mineral the loose powder feels so light, and they also got a little hint of glitter inside. The result: the powder “locked” my BB cream under it for 6-8 hours wear. And outside it gives a sheer of transparent veil (like it claims to be), not too glittery, but it makes my face bright, instead of dull.
I really recommend this finishing powder for daily wear, if you want to have a natural look, fresh, but not too overwhemingly out of place, but for “going to an event” look, or more glamorous look, I prefer to use my NYX HD mineral finishing powder, as they give more professional touch to my make up.

Thanks for reading, and till then!
God bless

-luz-

20140419-163342.jpg

Review: Tony Moly Backstage Gel eyeliner

Hi guys, so happy to find out that my last post about VOV Goodbye Eyepender liquid liner was helpful. therefore I want to make a review today for one of the most hyped Korean product for gel eye liner. It is the Tony Moly Backstage gel liner.

Tony Moly sells this one with two kinds of packaging. the first one is like this

they provide the brush as well as the gel eyeliner, which I think its space occupying (hehe) because if you are like me, like bring your brush set with you when you travel, you dont need more eyeliner brush, since you already have it in your travel brush set right? and most people, I believe, prefer using their own picked brush, rather than using the one provided by the company. One more thing, the brush tends to get dry product over it, so it become stiff and, if you want to use it, then you must clean first

so I bought the version without brush, which is also cheaper (but the choice is depend on your needs tho)

Image

Image

I want to mention some of the things I like about this gel eyeliner:

1. Its easy to use

2. Cat eyes is definitely effortless with this

3. dries quickly

4. upper and lower lash line? both are okay

Image

because the consistency is gel, its not as harsh as pencil liner nor like pen eyeliner, it’s softer and easier to create any line, bold or thin, so if you like to create cat eyes or winged liner like what I will show you in this post, it’s really really easy, and this is what I really like about this product. also it dries quickly so it doesn’t stain where it’s not supposed to be. I found that if I use liquid liner on someone who has hooded eyes, they have to keep their eyes closed until it dries, unless they want the eyeliner “transferred” to the hooded part of their eyelid which can create a big mess. yet if I use pencil or pen eyeliner (like nyx retractable eye liner) the product will smudge also to the hooded part of the eye and “fainting”, like by the end of the day you eyeliner will look more “transparent” :p

because of its texture, I also can use them for my lower lash line, simply by lining them with any product left on my brush after doing my upper lash. This is the only problem I have with my liquid liner (hix), because no matter how waterproof they are, I still cant manage to apply them nicely to my lower lash line, hence I need to use my pen eyeliner to “add” their lack.

what I dont like:

1. smudge after 5-6 hours wear

2. waterproof (?)

no more? yes no more, because of my eye contour (I dont know about double lidded person), my eyeliner will literally “stick” to my lower lid whenever I close my eyes. it doesnt stained them at first, but after 5-6 hours wear, the product starts to “fall out”. when I say fall out, it means that they start to get dusty, and its particles “dropped” to my lower lid, stain them, make me look like a panda….So right now, this eyeliner is definitely not my “go to” eyeliner, and I only use them when I know i’m just going to go for a short while, and when I am not exposed to much outdoor activities

also for the waterproof quality…. it’s not that good actually. I tried to use them when I was doing my exercise which means that I sweat a lot, also in the face. and tadahhh, they “fall out” even sooner and even worse…

but maybe for a little bit sprinkle of water, they still can hold to its “waterproof” claim

Soooo that’s that, this post is 100% based on my own experience and opinion with this eyeliner. Yet some people may find that this product is good for them, I’m happy for you guys then, and maybe this post can help someone to make up her mind whether to buy or not to buy this eyeliner….

Image

Image

Lots of Love and God Bless

-luz-


Review: Goodbye Eyepender Original VOV liquid eyeliner

Hey guys, this is my first posting about make up. I’ve been a fan of make up for quite a long time but haven’t got any courage to post what i thought about them, but this first step always take the most courage right? So as ive been told to do it afraid, then so it goes.

So this is my most fav eyeliner recently
I have a typical asian face, monolid eyes and trying so hard to find the best eyeliner that suites this kind of eyes. I’ve tried pencil liner, gel liner, and pen eyeliner but none of them suit my desire of having the perfect liner. I am going to post more of eye liner later if this post is helpful. But okay lets get to the point
This eyeliner comes in like typical eyeliner packaging, with tube and brush as you can see in the pic below. Actually I prefer this kind of packaging rather than the felt tip one coz the latter dry very quickly and i have to keep shaking the pen just to get the bold, typical black lining we always want to have, right?
And also this type of eyeliner, you can always dip the brush to the tube and get the custom amount you wish to apply
What so special for me is the brush, and ofcourse the quality of the eyeliner itself
The brush is not so thin like most of the nyx liquid liner have, if you are like me and want to enhance our monolid eyes, we need to apply them like the kpop artist does, the bold type one right? Because applying such a thin line wont make any difference…. As always, and vov has done a great job making their brush not soo thick like nyx big fat marker (the one that looks like spidol for whiteboard) but not too thin like many eyeliner product. They areeee, if i can say moderate, yes it is! It’s just FIT!
And the quality of the liquid liner, they are so fluid, no clogging even when you put them in AC or room temperature (not like my etude house dr.lash essence liner, which start to clog and harsh to apply), and no SMUDGING EVEN WHEN I SLEEP WITH IT!
Gosh I never found eyeliner like this
With monolid eyes I found that even the quickest gel eyeliner to dry (like tony moly gel eyeliner) is still produce smudge under eyes and i do look like a panda after 5-6hours wearing it, ughhhh! Anddd not to mention the pencil liner or the pen type eyeliner, they just create a big mess no matter how “waterproof” labeled on the product( well at least for eyes like me) but Not with this vov goodbye eyepender, i can literally use them for 24 hours, yes I’ve tried them when I travel by plane and have to slept over the night and then continuing the journey for the day after without any time to bath(okay that’s not nice, but i have to packed my schedule so everything can be done in time)
I can only wash my face without disrupting my eyemakeup, put a layer of bb cream and went on (haven’t i told u guys that they are also waterproof PROVED?)
The eyeliner sits there without “sprinkling” if thats explain? Okay they started to break a bit, but thats really minor, just small dots on my cheek at the end of the evening? And thats totally fine, right?

So that is my honest opinion about this most fav eyeliner I have ever tried and I would like to hear your story and maybe some suggestion too?

Till then, I hope this post is helpful, and God bless^^

-luz-

20140416-230409.jpg

20140416-230427.jpg

20140416-230444.jpg